the Precision Wheel Balancer Instructions
Mount the Wheel
1. Insert the pin into the Wheel bore and center the wheel on the pin.
2. Carefully place the wheel and axle between the magnets. The pin will only touch one of the magnets.
3. Allow the wheel to settle. The heavy side of the wheel will move to the bottom.
Mark Light Side
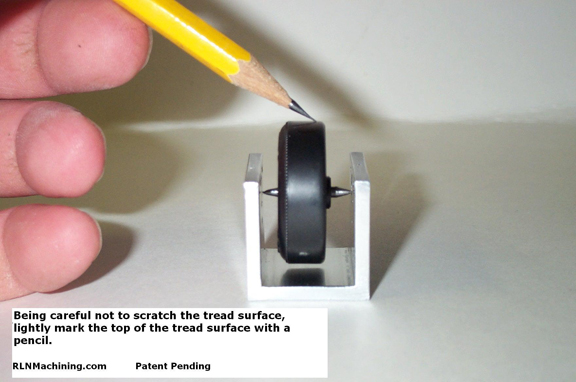
4. Being careful not to scratch the tread surface, Lightly mark the top side of the wheel with a pencil. This is the light side of the wheel.
Remove weight
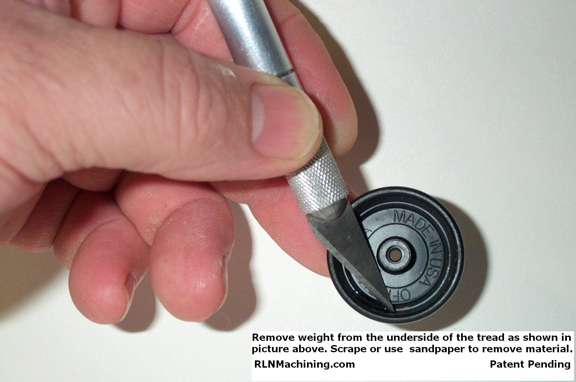
5. Remove the wheel and use sandpaper or a sharp knife (scrape, don’t carve) to remove a small amount of plastic from the heavy side . The heavy side is the opposite side from the pencil mark on the wheel. See picture for the proper place to remove the weight. The weight will be removed from the underside of the tread. Do not remove the weight from the tread surface.
6. Place the Wheel and axle back into the balancer and retest. If you remove to much weight, the heavy side will move. Continue until the wheel stays stationary in any position.
Important notes
1. The magnets on the Balancer are very strong and should not be placed within 2 feet of items that are affected by magnetic fields. Items such as credit cards, magnetic tapes, televisions, computer monitors, etc.
2. The ends of the pin have a small smooth radius. When balancing, try not to let the strong magnetic field pull the pin out of your fingers and smack into the magnet. This may damage the smooth radiused edge on the end of the pin and may reduce the accuracy of the Balancer.
3. If the performance of the Balancer declines, repair the ends of the pin with 600 grit sandpaper, followed by a hone stone . The ends of the pin should be sharp with a slightly rounded tip.
4. When the pin and wheel are placed between the Balancer magnets, you may notice that one magnet works better than the other. Try both sides (right or left magnet) to get the best performance.